Mode d'emploi pour pré encollé
Étape 1, Préparation
Laisser le placage et la pièce à recouvrir reposer pendant 24 heures dans les mêmes conditions avant l'utilisation. Une surface lisse, propre et sans corps gras est essentielle. Couper le placage de façon à ce qu'il excède la surface à recouvrir d'environ ¼".
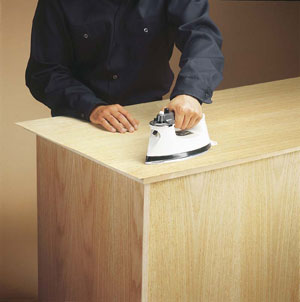
Étape 2, Application
Si la surface n'est pas du bois nu ou l'équivalent, effectuer un ponçage adéquat pour obtenir une meilleure adhésion. Préchauffer le fer à haute température ( 204 C - 400 F) et utiliser un papier d'emballage entre le fer et la surface afin de protéger cette dernière contre les égratignures et les brûlures. Déplacer le fer lentement, du centre de la feuille vers les cotés, tout en exerçant une pression uniforme derrière le passage du fer chaud.

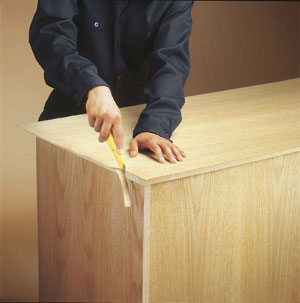
Étape 3, Massicotage
Après avoir laissé reposer quelques heures, vérifier s'il y a présence de bulles d'air à l'aide d'une lumière projetée en travers du grain de bois. Éliminer les bulles en pratiquant une incision dans celles-ci et réactiver la colle à l'aide d'un fer chaud. À l'aide d'un couteau universel tranchant, suivre avec soin le bord des surfaces.

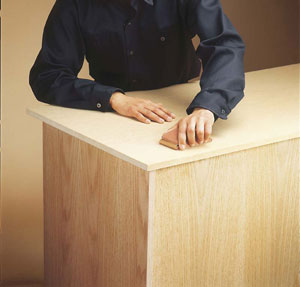
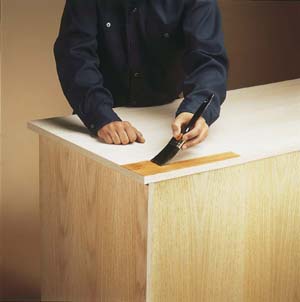
Étape 4, Finition
Comme les placages sont déjà poncés à l'usine, il suffit de poncer légèrement les bords massicotés avec un papier de verre fin. (Veiller à ne pas poncer les placages prévernis).Les placages prévernis doivent être retouchés sur les parties massicotées à l'aide d'un crayon de vernis. Les placages non vernis doivent recevoir une couche de scellant, la teinture, si désiré, et ensuite une ou deux couches de vernis en suivant bien les instructions du fabricant.


AUTRES GUIDES ET ASTUCES
Feuilles de placage flexiblesBandes de chant
Bandes de chant multi-plis
Les produits prévernis
Feuille de placage tissée
Auto-collant
Support de papier
DOCUMENTS PDF
Informations techniques sur les caractéristiques naturelles et communes du boisPrésentation et informations techniques sur les produits certifiés Greenguard
Description des types d'endos disponibles
Conseils et astuces à considérer au moment d'acheter vos feuilles de placage
Les rapports entre la température et l'humidité dans le bois
Présentation et informations techniques sur produits de bois d'ingénierie ÉVOLUTION HD
Méthodes d'assemblage des feuilles de placage
Informations techniques sur les méthodes de tranchage du placage de bois


